Installing some sort of window guard is high on my "to do list", and I have been going around in circles with interesting design ideas. Basically, it needs to provide some protection to the back window from clumsy loading of the bed, and also serve as a support for my loading lights and high park/brake/turn lights. Most of the time I spent drawing up little sketches I was concerned with a way to easily fold the guard down into the bed to make clearing snow off the window easy. I had come up with a quite a few arrangments that seemed practical, for use and ease of building. Then I realized, all I need is just over six inches of clearance and I can get my snow blade thing in the gap. In the end, I have decided to re-use the metal grate I scrounged up and put on the old Ford (instead of finding some expanded metal grillwork), and also keep using the red lights I had mounted on it - because 1) I had already done the work and 2) the lights are a nice generic design that is easy to get parts for or replace. For the loading lights, since I had stolen the ones on the Ford to use on my loader, I went down to the local "Made in China" mart and got some nice lightweight driving lights. I cut the grate off the Ford with my sawzall thing easily enough, and then broke, cut and ground off the remnants of the brackets and some other clutter on it. I cut two twenty inch pieces of some handy scrap galvanized punched angle steel to make the part that will mount to the bed, and used yet more scrap half inch angle iron to make two sturdy braces. Welded it all up, drilled mounting holes for the loading lights and primed it with some Rustoleum "rust reformer" primer and painted it black. It will be interesting to see how these various "rust fixing" primers I have played with lately compare to the "gold standard" POR-15. Why do I keep not using the POR-15? Because it's expensive and a pain to use - every opening of the can comes with the threat of the leftovers hardening in place and getting wasted. So I save it for times I am going to use a lot... Here it is after priming: 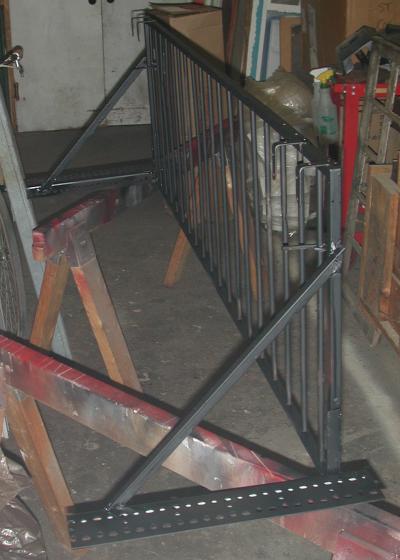 If you look carefully you can see the threaded rod and brackets I used to mount the (three hole) red lights in each corner. Those have been welded in place for years. Here it is, painted up, with the lights, installed on the truck: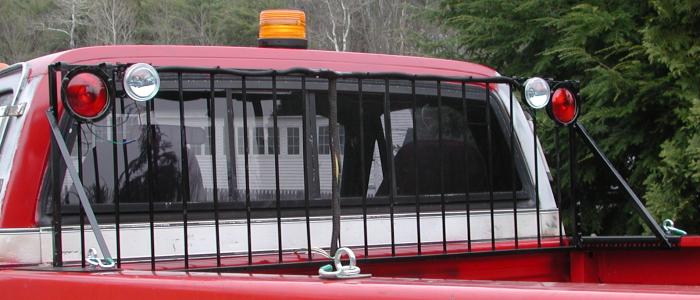 And a close up of how it is mounted, using an eyebolt at the rear to make a third tiedown on each side: 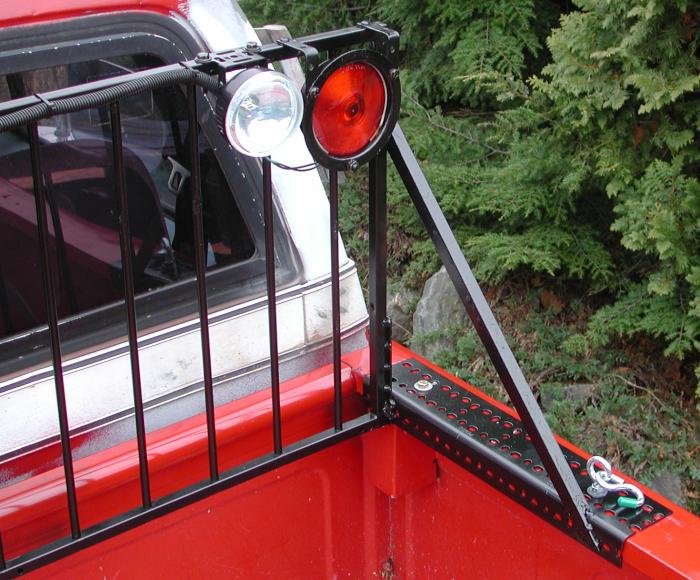 (P.S., the lights all work!) |