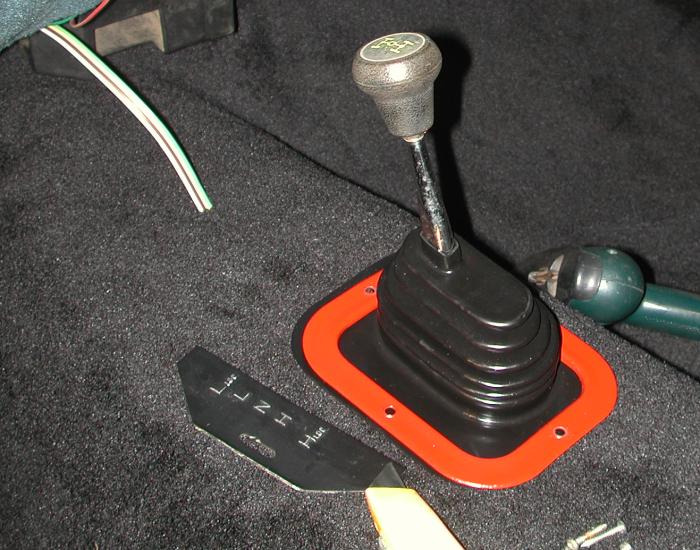
I decided to put an aftermarket "custom" fitted carpet in this truck, rather than a handful of remnant scraps, since it's a nice machine and deserves to sometimes look like it hasn't just been loaded up for a trip to the dump. (All it came with were a pair of bowtie logo rubber mats) At the same time, I am finishing up the seat belt project I got into while installing bucket seats. The belts that came with the truck had two problems. One was that the driver's side spool lock was very finicky, grabbing and jamming my belt too often for comfort and ease of use. The other was that the center latch parts were in a floppy plastic sheath, since the bench seat used to hold them in place. I gave up on using Audi seat belts from my collection for several reasons. The carpet was a hundred dollars and change, and I bought the cheapest seat belts I could find, which although listed as "for" my truck, were generic in nature. But they look good, and the center latches are on sturdy, self supporting rubber-covered cables. As you may know, the stock Chevy truck setup from this era has large 1/2" nuts welded into the floor pan for the seat belt attachment, requiring a vertical bolt through a horizontal mounting surface. The new belts were like my Audi stuff - requiring a horizontal bolt to hold them. So I cut up some old receiver hitch things to make ninety degree angle pieces for the centers and heavy U-shaped pieces for the outside, where I have to mount the spool and the lap end tab separately. I removed the seat assembly first, and put some random bolts in the mounting holes so I could find where to cut the carpet for them. I also ran some wires down the tunnel - a four-conductor set for future accessories (beacon, high reverse lights, do interior light correctly, etc.) - and a pair of speaker wires in case I want to put speakers behind me as well as in the doors. These were heavily duct-taped into place for protection, and so I didn't have to fight them while putting the carpet in. I bolted down the seat belt mounting brackets with grade 8 bolts, and lugged the unfolded carpet out to the truck to start fitting it. Although it is molded to fit the sheet metal, it takes some messing around to figure out where the "benchmark" might be - a place you can be sure is correct, to work from while making cuts for protrusions. It turned out that the rear edge went to the rear of the horizontal part of the cab just before it goes vertical at the very back. I worked forward, cutting holes and flaps at my seat belt brackets and the "marker" bolts for the seat mounts. I cut a hole in the right place for the transfer case lever pretty easily, and shoved the front of the carpet into place. I had to cut a bit away where the loud pedal is mounted, and of course a hole for the bright lights floorswitch. Here are some pictures of things at this point, awaiting tightening of the seat belt attachments and reinstallation of the seats.First, this view shows the center belt latches mounted to their angle iron brackets, and the "spool" of four conductor wire and the speaker wires coming out into the "behind the seats" area. 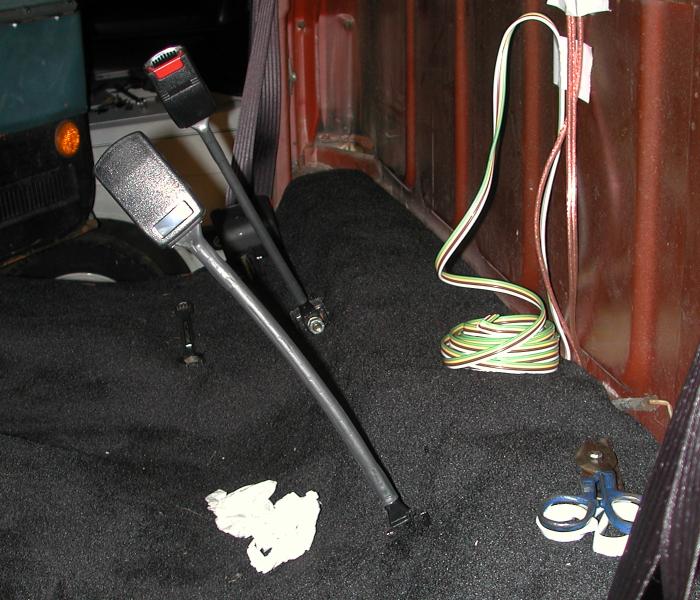 If you look carefully, you'll also see the loose front end of the four conductor wire, and the excess speaker wire I brought through the radio hole and draped over the steering column. 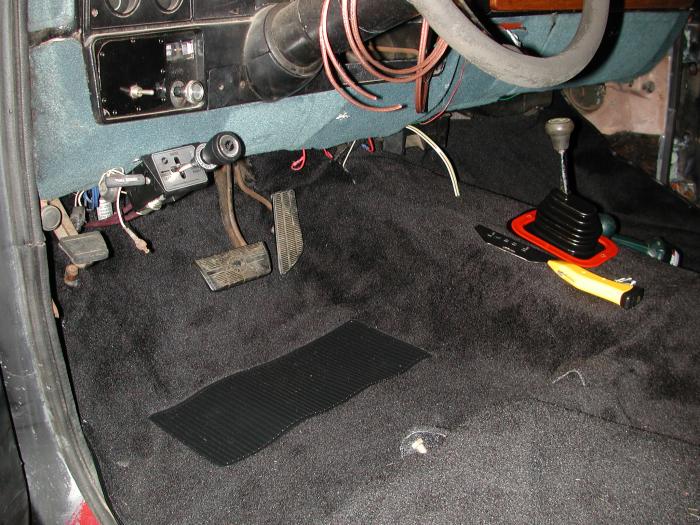
The picture on the right shows the new shoulder belt feed mounted in the stock location with the original bolt. 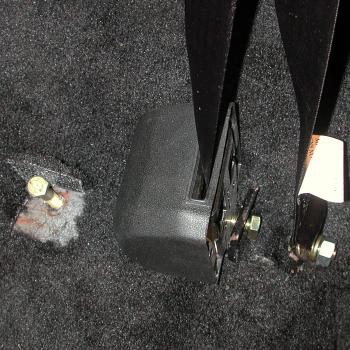
 The job is almost finished at this point. All that remains is to tighten the seat belt bolts (guessing at various angles a bit, but I did study them up before taking the seats out), and juggle the seat and console assembly into place and bolt it back down. I did find that this was made difficult by one of the seat mounting brackets having moved relative to the other one on the frame - so the holes wouldn't line up. Once I discovered the problem, a quick yank on the adjustment lever let them both spring into the same position and it was easy. A brief test drive affirmed that the belts operate and lie comfortably, and although it was dark out so I couldn't admire the appearance of the carpet, there was noticeably less engine and drivetrain noise - especially from the transfer case area. |